[ad_1]
How to Create Your Own Email Domain on Gmail
In today’s digital age, having a personalized email domain can create a professional image and help you stand out in a crowded inbox. While many use Gmail as their primary email platform, did you know you can create your own email domain on Gmail? By following a few simple steps, you can establish a unique email address that showcases your brand or identity. In this article, we will guide you through the process of creating your own email domain on Gmail, ensuring that your email communications are seamless and personalized.
Step 1: Domain Registration
The first step in creating your own email domain on Gmail is to register a domain name. There are various domain registrars available, such as GoDaddy, Bluehost, or Namecheap. Choose a domain name that reflects your brand, business, or personal identity and check its availability. Once you find an available domain, complete the registration process and make the necessary payments.
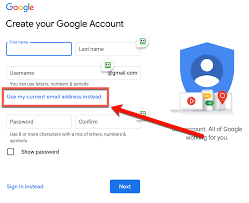
Step 2: Verify Your Domain
After registering your domain, you need to verify it with Gmail. To accomplish this, open your Gmail account and navigate to the settings section. Under the “Accounts and Import” tab, click on the “Add another email address” option. A dialog box will appear, prompting you to enter your desired email address and display name. Fill in the necessary information, ensuring that the email address matches the domain you registered. Click “Next Step”.
Step 3: Set Up Email Forwarding
To ensure all emails sent to your personalized domain are received in your Gmail inbox, you need to set up email forwarding. This way, any email sent to your personalized domain will be automatically redirected to your Gmail account. To enable email forwarding, go back to your domain registrar account and access the settings page. Look for the email forwarding option and input your Gmail address. Once the forwarding is set up, save the changes.
Step 4: Configure Incoming Mail Server
Now that your domain is verified and email forwarding is enabled, you need to configure the incoming mail server. Open your Gmail account and go to the settings section by clicking on the gear icon. Select the “Accounts and Import” tab and, under the “Check mail from other accounts” section, click on “Add a mail account”. A prompt will appear, asking you to enter the email address you want to add. Input the email address associated with your personalized domain and click “Next”.
Step 5: Enter Mailbox Details
In the next step, you will need to enter the mailbox details of your domain email. Select the “Import emails from my other account (POP3)” option and click “Next”. Fill in the required information, including the username, password, POP server, and port. Typically, the POP server is “pop.gmail.com” and the port is “995”. Make sure to check the box that allows you to leave a copy of retrieved messages on the server. This ensures that emails sent to your domain email address are also accessible via Gmail. Once you have entered all the necessary details, click “Add Account”.
Step 6: Verification and Finalization
Gmail will attempt to connect to your domain email server using the provided information. If successful, you will be asked if you want to send emails as your personalized domain. Select the option to send emails through Gmail and input the desired name or email address you want to display to recipients. Review the final settings and click “Next”. Gmail will send a verification email to your domain email address. Access the domain email and follow the instructions to verify the email address.
Congratulations! You have successfully created your own email domain on Gmail. Now all your emails will be encapsulated within your personalized domain, adding a touch of professionalism and uniqueness to your online communications. Remember to regularly check your Gmail inbox to stay updated on all incoming emails from your personalized domain.
Step-by-step Guide: How to Create a Gmail Domain for Your Business or Organization
Creating your own email domain on Gmail is a simple process that offers numerous benefits in terms of branding and personalization. Implement these steps, and take your digital presence to the next level. Enjoy the advantages of having a professional email domain while utilizing the user-friendly and efficient features of Gmail.
[ad_2]