
[ad_1]
A Step-by-Step Guide: Buying a Gmail Domain for Personal or Business Use
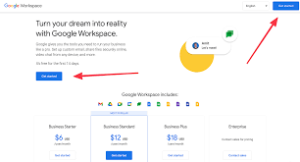
In today’s digital age, having a professional email domain is crucial for personal and business communication. While there are several popular email service providers available, purchasing a Gmail domain is a favorite choice for many due to its powerful features and robust security. This step-by-step guide will help you navigate the process of buying a Gmail domain for personal or business use.
Step 1: Research Domain Registrars
Before purchasing a Gmail domain, you need to find a reputable domain registrar that offers domain registration services. Some popular domain registrars include GoDaddy, Namecheap, and Google Domains. Compare prices, customer reviews, and features offered by different registrars to make an informed decision.
Step 2: Choose a Domain Name
Selecting the right domain name is crucial as it represents your personal or business brand. Consider a name that is simple, memorable, and relevant to your endeavors. Use domain name generators or brainstorm ideas that align with your vision. Ensure that your chosen domain name is available to purchase.
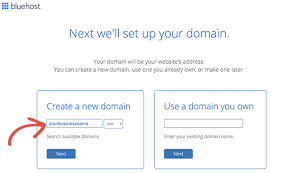
Step 3: Check Availability
Visit your chosen domain registrar’s website and search for your desired domain name. The registrar’s domain availability tool will show whether the domain is available or already registered by someone else. If your desired domain is unavailable, you may need to consider alternative options or variations of the name.
Step 4: Choose a Registrar
After finding an available domain, compare the registration costs and features offered by different domain registrars. Consider factors such as customer support, domain management tools, privacy protection, and renewal fees. Select the registrar that meets your requirements and proceed to purchase the domain.
Step 5: Register the Domain
Follow the registrar’s instructions carefully to complete the domain registration process. Typically, you will need to provide personal or business information such as your name, address, and email ID. Make sure the provided information is accurate and up to date, as it will be associated with your domain registration.
Step 6: Set up DNS Records
Once your domain registration is complete, you need to set up the Domain Name System (DNS) records. DNS records are critical as they determine how your domain is connected to other services, such as email servers. To set up DNS records for Gmail, you’ll need to modify the domain’s MX (Mail Exchanger) records. Refer to your registrar’s documentation or support for specific instructions on how to edit your DNS records.
Step 7: Get a Gmail Account
To use your newly registered domain with Gmail, you need to create a Gmail account. If you already have a Gmail account, log in to it. If not, visit the Gmail website and sign up for a new account using your preferred email address and a strong password. Ensure you secure your Gmail account with Two-Factor Authentication for an added layer of security.
Step 8: Configure Gmail for Custom Domain
Once you have a Gmail account, access your account settings and navigate to the “Accounts and Import” or “Settings” section. Look for the option to “Add another email address”. Here, enter the email address associated with your newly registered domain and configure Gmail to send and receive emails using your domain name.
Step 9: Verify Domain Ownership
To ensure that you are the authorized owner of the domain, Google will require you to complete the domain verification process. This typically involves adding a TXT DNS record or HTML file provided by Google to your domain’s DNS settings. The verification process varies depending on your domain registrar, so follow the instructions provided by Google accordingly.
Step 10: Start Using Gmail with Custom Domain
Congratulations! Your Gmail domain is now set up and ready to use. You can send and receive emails using your custom domain directly from your Gmail account. Make sure to update your email signature and inform your contacts about the new email address to complete the transition smoothly.
Step-by-Step Guide: How to Create a Domain Email with Gmail
In conclusion, purchasing a Gmail domain for personal or business use is a straightforward process that requires careful research, domain registration, DNS record configuration, and Gmail setup. By following this step-by-step guide, you can easily acquire and utilize a Gmail domain, enabling you to maintain a professional online image and enhance your personal or business communication experience.
[ad_2]