
[ad_1]
Step-by-Step Guide: How to Create an Email Domain with Gmail If you are a business owner or an entrepreneur, having a professional email domain is a must. It enhances your brand image, builds credibility, and establishes better communication with your customers. One popular email service provider that offers reliable domain emails is Gmail. In this step-by-step guide, we will walk you through the process of creating an email domain using Gmail.
Step 1: Purchase a Domain
Before setting up your email domain, you need to purchase a domain name. There are numerous domain registrars available where you can search for and purchase a suitable domain. Some popular domain registrars include GoDaddy, Namecheap, and Bluehost.
When selecting a domain name, make sure it is relevant to your business or brand. It should be easy to remember and ideally end with .com or a relevant extension. Once you have purchased the domain, move on to the next step.
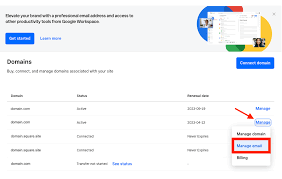
Step 2: Sign Up for G Suite
G Suite is a collection of cloud-based productivity and collaboration tools by Google. It offers various features, such as email, document sharing, calendar, and more. To create your email domain with Gmail, you will need to sign up for G Suite.
Visit the G Suite website and click on the “Get Started” button. You will be prompted to enter your domain name, business size, and contact information. Choose the appropriate G Suite plan based on your requirements and follow the instructions to set up your billing account.
Step 3: Verify Your Domain
Once you have signed up for G Suite, you need to verify your domain to prove that you own it. Google provides various methods for domain verification, including adding a DNS record, uploading an HTML file, or adding a meta tag to your website.
Select the method you find most convenient, and then follow the detailed instructions provided by Google to complete the verification process. It may take a few minutes or up to 48 hours for the verification to be completed.
Step 4: Set Up Email Accounts
After successfully verifying your domain, you can now set up email accounts for your business. Open the G Suite Admin Console and navigate to the “Users” section. Click on the “Add new user” button and enter the required information like first name, last name, and desired email address.

Create a strong password and set the account to be the primary email for your domain. Assign the appropriate privileges and roles to the user, such as email access, calendar access, etc. Repeat this step to create multiple email accounts for your team members if needed.
Step 5: Configure DNS Settings
To ensure seamless email delivery, you must configure the DNS settings for your domain. Log in to your domain registrar’s website and access the DNS management settings. Look for an option to edit your DNS records, usually named “DNS Management” or “DNS Settings.”
Add the required DNS records as provided in the G Suite Admin Console. These records include MX records, TXT records, and CNAME records. Each record contains specific information that Google needs to route your emails correctly. Save the changes and allow some time for the DNS changes to propagate.
Step 6: Set Up Gmail Client
To access your email domain, you and your team members will need to configure email clients. The most common and user-friendly option is to set up Gmail as your email client. Open a web browser and visit the Gmail login page.
Click on the settings gear icon at the top right corner and select “See all settings.” Navigate to the “Accounts and Import” tab and click on “Add another email address” to configure your domain email. Follow the on-screen instructions, enter your email address, select “Treat as an alias,” and choose “Send mail through your SMTP server.”
Enter the necessary SMTP server details provided by Google, including server address, username, and port numbers. Click on “Add account” to complete the setup. Now you can send and receive emails using your professional email domain through Gmail.
A Step-by-Step Guide: Buying a Gmail Domain for Personal or Business Use
Conclusion
Creating an email domain with Gmail provides a professional touch to your business communications. By following this step-by-step guide, you can easily set up your email domain using Gmail’s G Suite. Remember to purchase a domain name, sign up for G Suite, verify your domain, set up email accounts, configure DNS settings, and finally, configure Gmail as your email client. With a professional email domain, you can enhance your brand presence, build trust, and streamline your communication with both customers and team members.
[ad_2]