

[ad_1]
The Ultimate Guide to Setting up a Professional Business Email on Gmail
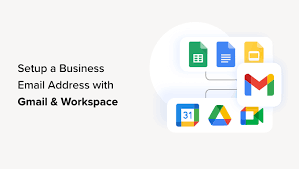
In today’s digital age, having a professional business email is crucial for any professional or business owner. It not only enhances your brand identity but also establishes credibility and improves communication with clients and customers. One of the most popular email service providers is Gmail, which offers a wide range of features and functionalities to streamline your email management. In this article, we will guide you through the steps to set up a professional business email on Gmail.
Step 1: Choose a domain name
The first step is to select a domain name that reflects your business identity. It is recommended to choose a domain name that includes your business name or relevant keywords. For instance, if your business name is “XYZ Marketing Agency”, you could opt for a domain name like “xyzmarketing.com”. Register your domain with a domain registrar or web hosting provider.
Step 2: Sign up for G Suite
G Suite is a suite of Google products that includes Gmail, Google Drive, Google Docs, and more, specifically tailored for businesses. To sign up for G Suite, visit the G Suite website and choose a plan that fits your business needs. The Basic plan starts at $6 per user per month. Fill in your business details and select your domain during the sign-up process.
Step 3: Verify your domain ownership
After signing up for G Suite, you’ll need to verify your domain ownership to prove that you own the domain you want to use for your professional email. There are various verification methods available, such as adding a TXT record to your domain’s DNS settings or uploading an HTML file to your website. Follow the instructions provided by G Suite to complete the verification process.
Step 4: Set up your business email
Once your domain ownership is verified, you can start setting up your professional business email. Log in to your G Suite admin console, and go to the Gmail app. From there, you can create email accounts for yourself and your team members. Enter the desired username and choose your domain. Set a strong password and any additional security measures you prefer. Finally, click on “Create Account” to complete the setup.
Step 5: Customize your business email
Now that your business email is set up, it’s time to customize it to align with your brand. Go to the Gmail settings and navigate to the “Accounts and Import” tab. From there, you can choose to add an email signature, customize your display name, and modify other settings according to your preferences. Make sure to upload your business logo and select a professional-looking theme to enhance the overall appearance of your email.
Step 6: Migrate your existing email
If you already have an existing email account, you’ll want to migrate your old emails and contacts to your new professional email on Gmail. G Suite provides detailed instructions on how to do this using the Gmail Migration Tool or other third-party migration tools. This will ensure a seamless transition and prevent any loss of important emails or contacts.
Step 7: Set up email forwarding
To streamline your email management, you can set up email forwarding from your professional business email to your personal email or vice versa. This way, you’ll never miss any important emails, as they will be automatically forwarded to your desired email account. In Gmail, go to the “Forwarding and POP/IMAP” settings to set up email forwarding.
Step 8: Enable additional security measures
To protect your business email from potential cyber threats and unauthorized access, it is essential to enable additional security measures. G Suite provides various security features such as two-factor authentication, which adds an extra layer of protection by requiring a secondary verification code before logging in. Enable these security measures to safeguard your business email and sensitive information.
Step 9: Access your business email on multiple devices
Gmail allows you to access your business email on various devices, including smartphones, tablets, and desktops. Install the Gmail app on your preferred device or use the Gmail website to log in and access your email from anywhere, anytime. This flexibility ensures you can stay connected and respond to important emails even when you’re on the go.
Step 10: Make use of additional Gmail features
Gmail offers a plethora of additional features that can enhance your email experience and productivity. Explore features like labels and filters to organize your emails, use the search functionality to quickly find specific emails, and set up automated replies for when you’re out of the office. Familiarize yourself with these features to make the most out of your professional business email on Gmail.
Streamline Communication with a Gmail Business Email: A Step-by-Step Guide
In conclusion, setting up a professional business email on Gmail is a straightforward process that offers numerous benefits, including improved brand identity, credibility, and efficient communication. By following this ultimate guide, you can ensure a seamless setup and make the most out of Gmail’s features to enhance your professional email management.
[ad_2]